An old recipe for yeast-free sourdough bread. Source "kLibe" V.Zeland
The basis of the basics, a faithful assistant to the baker, a friend - this is how you can call Mother natural sourdough. In ancient times, it was passed down from generation to generation, from mother to daughter. She was taken care of like the apple of an eye, because the natural leaven is alive and the bread that we bake on it is alive. And like any pet, sourdough requires love. Love it and you will get a wonderful product in return - unleavened bread!


The more you learn about natural sourdough, the more and more questions appear than answers. It seems that the baker must be a chemist to understand the whole process taking place in a bowl of flour and water. But the daily experience of baking and a little intuition tells me that baking bread and feeding the sourdough, she lives a long time, and pleases me with her little sour fruity aroma.
There are two phases in the life of natural sourdough: wiring cycle, lasting from 6 to 10 days, and a maintenance cycle. The dispensing cycle starts the extraction process wild yeast contained in flour, and lactic acid bacteria, which then create an unforgettable taste of Lithuanian bread.
After adding water to the flour, after 24 hours the water-flour mixture begins to grow. This indicates that gas appears in the bowl and the metabolic process begins. With daily feeding of starter, it gradually begins to dominate favorable types of bacteria. And the task of the baker at regular intervals feed your baby like any living being. And the result will make itself felt. The sourdough gains strength so that the baker can bake real yeast-free bread on it.
Natural sourdough bread in different regions will be different, since wild yeast and bacteria from the environment different regions are very different. Therefore, having received a sourdough from Germany, after what time will you receive your regional one, due to the presence of different water and a different grain composition in flour. And this is what will give your bread its unforgettable aroma and taste. I repeat, typical for your region!
1. Do not use bleached flour(highest grade) neither for breeding nor for maintaining natural sourdough. Since it has already destroyed the important nutrients contained in the flour.
2. Never use tap water as chlorinated water interferes with the fermentation process.
3. At the initial stage (even if you breed wheat sourdough) better to use rye flour, as it has the maximum amount of nutrients and fermentable sugars, which provides good starting conditions for sourdough.
4. It is desirable to keep the starter at a constant temperature not lower than 8 degrees otherwise part of the starter microflora will die.
Breeding rye sourdough
Ingredients: whole grain rye flour- 490 grams, well water- 490 grams.
Cooking method:
1 day: 140 grams of whole grain rye flour + 140 grams of well water, mix well, cover with a film and leave in a warm place (24-27 °) for 24 hours.
2 days one feeding: ¼ of the previous mixture 70 grams + 70 grams of whole grain rye flour + 70 grams of water, mix thoroughly, cover with foil and leave in a warm place (24-27 degrees) for 24 hours.
This video is about how to make sourdough starter at home.
A 100% moisture sourdough is a sourdough that is 50% water and 50% flour.
Sourdough is essentially a sour dough in which wild yeast (which makes bread rise) and lactic acid bacteria live. Lactic acid bacteria feed on the waste products of yeast and create an acidic environment in which this yeast lives perfectly (and in which various fungi, mold, i.e. "bad" bacteria, do not survive). We can say that they exist on mutually beneficial terms. Both are contained in the air, water, flour, and thus they fall into the leaven. To remove the sourdough, we only need flour and water, well, patience)
The easiest way is to remove the sourdough from rye flour, and then, if necessary, refeed it to another flour.
Flour I used
1 Peeled rye "Magician"
2 Wheat whole grain wallpaper "French thing"
3 Wheat V/S "Solar mill", it is better to take 1 grade or the lowest quality of the highest grade.
Derivation:
Use a glass or plastic container
1 day
50 gr water, 50 gr flour
Day 2 (if there are changes, if not, we wait another 12 hours)
3 day
50 gr sourdough, 25 gr water, 25 gr flour
Day 4
50 gr sourdough, 25 gr water, 25 gr flour
Day 5
if the starter is strong, we begin to feed 1d2
25 gr sourdough, 25 gr water, 25 gr flour
In this proportion, we feed for a few more days, until the starter gains strength.
We store the finished sourdough:
--- at room temperature (26-28 degrees) and feed 2 times a day (morning and evening) 1d2 or 1 time per day 1d4, 1d8 (more often I feed 1d8, because my sourdough is strong and "eats" a lot))
--- in the refrigerator (approximately 100-150 g) and feed 1-2 times a week (we take it out of the refrigerator, let it warm, feed, wait for the peak of activity, then put it back in the refrigerator)
Questions:
- Got mold? - You can discard the starter and start over.
Recipe for sourdough pancakes https://www.youtube.com/watch?v=xRCDCW0uFUg
Good day! Today we’ll talk about sourdough for bread, or rather, how to grow sourdough at home. There are a huge number of ways to remove starter cultures. I will show one of my favorites and the simplest, and in the description of the video I will tell you in detail what sourdough is.
I will grow 3 types of sourdough in parallel: the first one is on peeled rye flour, the second one is on whole wheat whole grain wallpaper flour and the third one is on ordinary white wheat flour of the highest grade. I will write more about all the types of flour I used in the description of the video.
And so, let's get started. Day one: for the first starter we take 50 g of water at room temperature (it is recommended to use boiled water, but I use the usual one from the filter), add 50 g of rye flour to it and mix. We will get a fairly thick mass. For the second starter, mix 50 g of water at room temperature and 50 g of whole wheat flour. For the third sourdough, mix 50 g of water at room temperature and 50 g of premium wheat flour (it is better to use 1 grade). The third sourdough will turn out to be less thick in consistency. Do not tightly cover the sourdough cups with lids and leave for 24 hours in a warm place without drafts and without direct sunlight. The optimum temperature is approximately 28-30 degrees. If no changes have occurred with the starter during the day, leave it for another 12 hours.
After this time, the sourdough will begin to bubble slightly and develop a rather unpleasant odor. What do we do next? We mix each sourdough well and transfer 50 gr. to a clean glass. Throw away the rest of the yeast. To the first starter we add 25 g of water at room temperature and mix well, then add 25 g of rye flour. Thus, it turns out that we feed the starter 1: 1 - for 50 g of starter we take 50 g of a mixture of flour and water. We do the same with other starter cultures, only for each we add its flour. We leave the starter for another 24 hours.
After this time, a rather stormy and active life began in my cups. And we continue to feed our starters: put 50 g of starter into a clean glass, add 25 g of water at room temperature and 25 g of flour, mix everything and leave for another day.
On the fourth day, the starter cultures acquire a rather pleasant sour-milk smell. The first rye sourdough already has a rather pleasant smell of bread and is permeated with air bubbles. The second and third starters are still less active, but we continue to feed them.
To begin with, as always, we mix the starter cultures well and feed according to the old scheme, i.e. 1:1 - for 50 g of sourdough we take 25 g of water at room temperature and 25 g of flour. We leave the starter for another day.
And so, what we see on the fifth day: the first rye sourdough is still quite active, the second sourdough from whole grain flour is gradually gaining momentum, and the third sourdough from white flour is still not quite active enough. Because rye sourdough has already gained strength, I will feed it 1: 2, i.e. for 25 g of sourdough, I take 25 g of water at room temperature and 25 g of rye flour and mix everything well. I feed the second and third starter according to the old scheme: 1:1, i.e. for 50 g of sourdough I take 25 g of water and 25 g of flour.
The next day, the sourdoughs almost doubled in volume, but it’s still too early to bake bread on them, they need to gain strength. Therefore, we already feed all the starter cultures according to the 1: 2 scheme, i.e. for 25 g of sourdough we take 25 g of water and 25 g of flour.
I would like to note that everything is very individual with starter cultures, i.e. you can make a sourdough after 5 days and after a week and after 1.5 weeks. It depends on many factors: on the temperature of the content, on water, on flour, so be patient and everything will work out.
Again, all our starter cultures have increased in volume by about 2.5 times. From this we conclude that, in principle, sourdough can be derived from any flour, but it is easier and faster to make it from rye flour. And before you bake bread on them, it’s still better to feed them for a couple more days.
What should we do next with our sourdough? If you plan to bake frequently, it is best to keep her at room temperature and feed her either twice a day at a 1:2 ratio or once a day at a 1:4 ratio. If the conditions of detention are quite hot, then you can increase the proportions to 1:8. If you plan to bake once a week, then it is more reasonable to keep the starter in the refrigerator and feed it 1-2 times a week, but do not rush to put the unripe starter in the refrigerator for at least 10 days.
Don't throw away the rest of the starter, I collect it in a container and store it in the refrigerator. They make very tasty waffles and pancakes, the recipes of which I will definitely share with you.
And now I want to show how you can overfeed the sourdough to another flour. Let's take the third sourdough on wheat flour and feed it with rye flour in a ratio of 1:2. Take 10 g of sourdough, 10 g of water and 10 g of flour, mix everything and leave in a warm place.
We will do the same with rye sourdough, but we will feed it with premium wheat flour. We take 10 g of rye sourdough, 10 g of water and 10 g of wheat flour, mix and cover.
After a few hours, we can notice that both the first and second starter are quite active, they have increased in volume and are riddled with air bubbles. From this we conclude that any sourdough can be overfed for another flour.
Many will say that the process of removing the sourdough is very laborious. Yes, the process is quite lengthy, but not complicated at all, and sourdough bread will justify all your efforts. Therefore, be patient and bake delicious and fragrant sourdough bread!
I have been nurturing the idea of growing sourdough for bread for more than one year. I read a lot about her on the Internet, rummaged through a bunch of books, then decided that it was all beyond my power, and ... forgot. Then again this idea appeared, and again: the Internet, books, forums...
In general, one fine evening, or rather even a night, because it was already almost 12, it hit me: I need to make a sourdough. I got up from my chair, went into the kitchen, measured out the required amount of flour and water, mixed it, covered the jar with a lid and, satisfied, went to bed.
In the morning, the first thing I ran to the bank. Right next to it, disappointment overtook me: as everything lay like a dead weight, flattened along the bottom of the jar, so it lies. And I drew in my imagination air bubbles, an increase in the leaven, well, at least twice ... Well, okay, there is nothing to do, you need to "feed" this something spread along the bottom. To "feed", by the way, means to give more flour and water to this still simple mixture of flour and water. "Fed", again left for a day. And again a disappointment befell me ... It seems like something bubbled up there, as it seemed to me, but no ... Again I "fed" ... In general, at a certain moment she really bubbled up, she became more! Here it is, my happy happiness, - I thought, and gave her a fresh portion of food: water and flour. And the next day, that's all - happiness was so short-lived ... She somehow fell down, the bubbles disappeared. Everything, - I decided, this is the end! And my failed sourdough flew down the toilet along with dreams of healthy, tasty and lush bread, sorry!
The second time was no different from the first. The scenario for the development of events was the same.
Well, how is it? And I’m reading on the Internet - in 5 days your sourdough is ready! And mine on the 4th day somehow subsided. She died, so she died - I decided. And again the toilet, sorry!
In general, I’m not a lady who is fond of: something didn’t work out - God bless him. I will not redo it, but I will simply give up this occupation. And here it’s just a matter of principle or something: I thought about it, thought, what and how, took into account all the mistakes and shortcomings and started the sourdough for the third time. And - oh, a miracle - it turned out !!! I baked wonderful bread on it! Knowledgeable people claimed that this is exactly the one - delicious, incomparable sourdough bread! How flattering to hear that!
Then I overfed her for wheat.
The sourdough that you will see today is my fourth attempt and the second successful one.
So, my advice to you.
If you decide to start a sourdough, know that you have become a parent! It doesn't matter how many children you have in total, the starter is another: second, third, fourth ... a child that probably needs more attention than the rest of the cubs.
Sourdough is a living organism! She may live or she may die. If you notice mold on the surface of the sourdough, it's best to throw it away. You can try to remove it carefully, but here I can not vouch for the outcome. Better get a new one. I have never had mold.
At first: it will stink for 2-4 days... Not really, but it definitely won't smell like Dior perfume! The smell is somewhat similar to the aromas of stale flour, or fallen autumn leaves, which have been pretty battered by rain and mud.
Perhaps there will come a moment when it will seem to you that the leaven of that ... ordered to live long. Don't despair, "feed" her! It is at the moment when it "silences" that the bad bacteria are forced out by the good ones and it starts to smell! My God, how she smells!!! There are apples, and something similar to Easter cakes, and flowers...
It is not a fact that on the fifth day your sourdough will be ready to bake your bread!!! It may not be ready on the sixth day, or on the seventh, or it may be ready on the fourth. What is it connected with? But I won't tell! Sometimes it seems to me that you, who suddenly got up on the wrong foot, and the sun that rose at the wrong time, and the moon that did not shine so much last night, and also the neighbors, crying children, the child who brought from school " deuce", not the temperature in the room, the husband kissed the wrong cheek, and in general everything is wrong!
When I read that half of the leaven should be thrown away, I thought: “Oh, what blasphemy! How is it, I tried so hard, and then throw it away !!!” But then I realized that the more sourdough you have (and this is the weight of flour and water, plus the previous "feeding"), the more food she needs: do you remember that sourdough food is flour and water! Therefore, part with leaven if the situation requires it.
The ratio of flour and water will always be the same: i.e. if you took 30gr. flour, then you need the same amount of water. 50gr. flour - water, too, 50g., 150g. flour - water 150g.
And I also learned something important: rye sourdough is a beauty! Wheat - like a teenager: harmful and capricious! And rye will not show off, it is easy to grow!
Well, everything seems to be. There will be questions, write in the comments.
So, for the preparation of rye sourdough for bread, we will prepare the products according to the list.
It is better to take a container for sourdough plastic or glass.
I took 30 gr. flour and 30 gr. water. This time, my sourdough was ready on the fifth day, so the amount of ingredients indicated 150g. of both.
Go. The magic has begun!
The first day.
We mix 30 gr. flour and 30 gr. water. Mix well. Leave for a day at room temperature.

Second day.
It seems like some kind of stirring begins, but still very weakly.
We give the sourdough to eat: 30 gr. flour and 30 gr. water. Stir, cover, leave in a warm place.

Day three.
Here you can already see with the naked eye an increase in leaven, and there are more air bubbles.
And again add flour and water, all 30 gr. Cover with a lid and leave at room temperature.
At this time, she actively "smells". It's better not to open the lid :-)

Day four.
It is on this day that the extinction of activity can be observed. Mine was active, as if not in itself :-)
If you happen to have no bubbles, "feed" her in the same way: 30 gr. flour and 30 gr. water.
And when you wait for such an increase in the leaven, it's time to move on to a partial parting with it :-)

So, we throw away half of the leaven. It's a pity? Certainly! But what to do...
To the rest, add flour and water, all 30 gr each. Stir, cover, leave at room temperature.
I marked the sourdough level to see later how much it had grown.

And this is how it grew after 4-5 hours.
In general, rye sourdough for bread is ready ...

But to be on the safe side, I "feed" her again: I threw away half, added flour and water to the rest, all 30 gr each.
There's sourdough in the jar because the lid from the plastic container broke.
And again marked her level.

And this is how it grew after 4 hours.
You can already bake bread with this sourdough...

For example, this one.
It doesn't contain any yeast! Only leaven bred at home.

Good luck with your rye sourdough!

What could be nicer than a sip of refreshing brewed kvass in the summer heat? And if it is also cooked with your own hands, then this is generally just a fairy tale! Do you want to know how to make kvass starter at home? Then you to us! Let's cook and experiment together.
All starter cultures used to make kvass can be divided into yeast and yeast-free - with the addition of yeast and without the use of yeast, respectively. Yeast-free sourdoughs ripen longer in time than yeast ones, but the kvass obtained from them does not have the specific smell of baker's yeast. The basis for sourdoughs is usually flour (rye or wheat) or bread, while rye or wheat malt and hops can also be used as additional ingredients. Raisins, honey, apple peel or grape skin can also be added to starter cultures - these ingredients help activate the fermentation process and make kvass more aromatic. Despite the fact that the most delicious kvass, as it is believed, is obtained from rye bread, it is not forbidden to use wheat crackers as the basis for sourdough - they should be thoroughly dried in the oven so that the kvass has a beautiful color at the exit. But rye bread can be taken with the addition of cumin - it will give the drink a spicy flavor note.
High-quality sourdough is the key to successful preparation of tasty and healthy kvass. The secrets here are extremely simple. First, cook your sourdough with boiled water only, as using raw water changes the fermentation process and can cause stomach upset. Secondly, follow the rules of hygiene. This means that the container in which the starter will ferment should be thoroughly washed with hot water, and even better, sterilized to get rid of unnecessary microorganisms. It is best to make sourdough in glass or enamelware, but not in plastic or aluminum. Do not use containers that previously contained dairy products to prepare starter. Thirdly, there is no need to rush - let the sourdough ferment completely, as unripe raw materials may contain compounds that are hazardous to health. Also remember that only fresh yeast is suitable for making sourdough, otherwise do not expect a delicious drink.

Cooked sourdough can be stored in the refrigerator for a long time and used as needed. If you keep your sourdough in the refrigerator, don't forget to "feed" it once a week - this is done, for example, by adding rye flour, raisins or hop cones. The sourdough can also be frozen, but it may take 2 to 4 days for it to "revive" before use.

Bread sourdough with yeast
Ingredients:
2 tablespoons dried bread crumbs
100 g sugar
50 g pressed yeast
1 glass of boiled water.
Cooking:
In warm water, heated to about 40 degrees, dissolve the sugar. Pour the bread crumbs with the resulting liquid and leave for an hour. Dissolve the yeast in a small amount of warm water and add to the soaked bread crumbs. Keep the starter in a warm place for two days.
Yeast starter for kvass
Ingredients:
10 g dry baker's yeast,
2 tablespoons rye or wheat flour
1 tablespoon sugar
100 ml of boiled water.
Cooking:
In a bowl, combine flour with yeast and pour in warm water heated to 30 degrees. Stir the mixture well, cover the bowl with a towel and put it in a warm place for half an hour. The starter is ready.

Yeast-free sourdough for kvass from rye bread
Ingredients:
2 cups boiled water
a slice of rye bread
1 teaspoon of sugar.
Cooking:
Pour water into a 0.5 liter jar. Add bread and sugar, mix. Cover the jar with gauze and put in a warm place for fermentation. The sourdough will be ready in 1-2 days, and you can determine its readiness by taste and appearance - the sourdough should be cloudy and have a sharp taste.
Sourdough for kvass from rye flour without yeast
Ingredients:
10 tablespoons rye flour
200 ml boiled water,
1 teaspoon of sugar.
Cooking:
Pour 100 ml of water into a bowl, add sugar and 4 tablespoons of flour. Stir until you get a smooth consistency, reminiscent of sour cream. Cover the bowl with a slightly damp towel or gauze and leave overnight at room temperature. After that, add 2 more tablespoons of flour and 50 ml of water to the starter. Mix well, cover the bowl again and leave to ferment for another day. On the third day, repeat the previous step, adding the remaining ingredients. On the fourth day, the sourdough will be ready - it will bubble slightly and acquire the characteristic smell of rye bread. Such a starter can be stored in the refrigerator, once a week “feeding” it with 2 teaspoons of rye flour.

Yeast-free sourdough breadcrumbs with raisins
Ingredients:
250 g rye bread,
4 tablespoons of sugar
2 tablespoons raisins,
boiled water.
Cooking:
Cut the bread into small pieces and dry in the oven until a crust appears on the cut. Put the resulting crackers in a liter jar and pour boiling water so that they are completely covered with water. Add sugar, mix and let cool to a temperature of 35-37 degrees. Then add raisins, mix and put in a warm place for fermentation. After 2-3 days, when the sourdough begins to foam and has a sour smell, it can be considered ready.
Yeast-free rye sourdough with hops
Ingredients:
500 g rye flour
4 tablespoons of hops,
2 tablespoons of sugar
500 ml of water.
Cooking:
Pour the flour into a saucepan and add enough water to make a dough when mixing, as for pancakes. Add crushed hop cones, 500 ml of water and put the pan on fire. Bring to a boil and cook at a slow boil for 15 minutes. Cool to a warm temperature and stir with sugar. Cover and put in a warm place for 10-12 hours.
The following recipe allows you to immediately "kill two birds with one stone" - to cook kvass and get the sourdough from the remaining sediment, in order to use it in the future to prepare a new portion of kvass.
Yeast sourdough breadcrumbs with hops
Ingredients:
300 g rye bread crumbs,
10 g pressed yeast
2 tablespoons of sugar
2 tablespoons hop cones,
1 tablespoon rye flour
1 tablespoon raisins,
3 liters of water.
Cooking:
Add flour and sugar to yeast diluted in a small amount of warm water and mix until smooth. Put the crackers in a 3-liter jar and pour hot water, not reaching the shoulders. Add hop cones and raisins, mix and let cool to a temperature of 30-35 degrees. Pour the yeast mass into a jar, mix, cover with a towel or gauze, then put in a warm place for 2-3 days. Using gauze, drain the finished kvass, and add 3 tablespoons of sugar and some crackers to the remaining sourdough. Pour in water and put back in a warm place for fermentation. After the kvass has been drained, part of the starter can be put in the refrigerator for storage, and the remaining starter can be used for the next preparation of kvass, adding sugar, crackers and water. The sourdough stored in the refrigerator needs to be “feeded” from time to time with hop cones and a small amount of raisins.
Now, having learned how to make kvass starter at home, you can always cook live natural kvass on your own and delight your loved ones and friends with it. Bon appetit and the most delicious homemade kvass!
There are many recipes for making sourdough bread at home on the Internet, but they all look overly complicated. From the outside, it may seem that growing your own sourdough is akin to nursing an injured hamster, although in fact, making sourdough is no more difficult than buying yeast in a store. But the bread that you make with your own sourdough will surely change your ideas about this familiar product: it is tastier, more aromatic and lasts longer.
In addition to the process of making sourdough for bread (simple and straight as a stick), we will also talk about how you can use sourdough, because you don’t have to look for special recipes for this: you can bake not only bread, but also pizza with sourdough. , pies and other pastries. So start growing your sourdough starter today, because in exactly one week I will give you the recipe for my favorite rye bread, which anyone can make.
Sourdough bread at home
Complexity
low
Time
7 days
Ingredients
100 g sourdough
flour
water
How to make sourdough for bread
You can make sourdough with any flour, and although it is believed that it will ripen faster on rye, I prefer wheat. The point here is that rye sourdough has a rather specific taste, which is not suitable for some types of baking made from wheat flour, but wheat sourdough can be used to bake both wheat and rye bread. If possible, use regular flour mixed with whole wheat flour, but this is not necessary.
So, take a glass or ceramic jar, combine 50 grams of flour and 50 grams of warm water in it, and mix until smooth. Cover loosely (a pair of foil folded in a couple of layers, pierced in several places to provide airflow will do) and leave in a warm place for 2 days. After this time, the starter should acquire a smell (so far not very pleasant) and bubble slightly: this is a sign that lactic acid bacteria have settled in it.
Starting on the third day, feed the starter by mixing 20 grams of starter (discard the rest), 40 grams of warm water and 40 grams of flour. The sourdough should be fed every 12-24 hours - the more often, the faster it will gain the strength we need. The sourdough is ready for bread when it has doubled in volume within 6 hours of being fed.
How to store sourdough
If you plan to bake bread at least once every two days, the sourdough can be stored in a cool place, used as needed and fed in the proportion of 1 part sourdough - 2 parts water - 2 parts flour every two days. Otherwise, it is better to store the starter in the refrigerator, transferring it to a jar with a lid, in which you need to make holes. If storing the starter in the refrigerator, move it to room temperature and feed 12 hours before baking the bread, and/or feed every 7 days as described above.
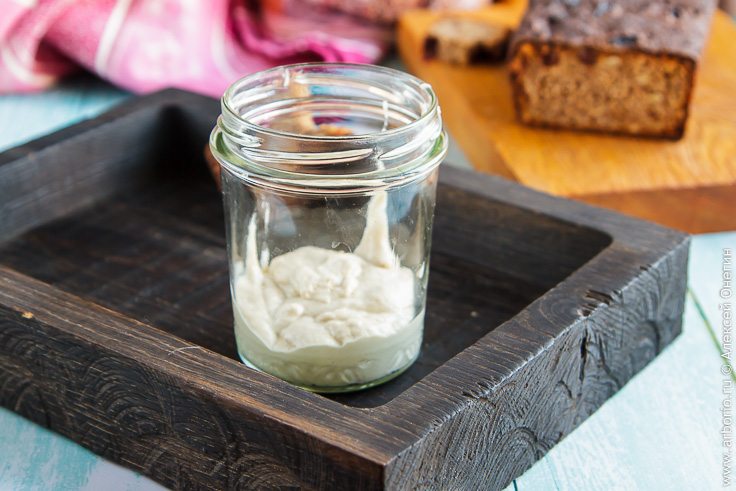
The consistency of the sourdough at different stages of life will be different: thick after top dressing and more liquid after the yeast has worked properly. In the photo - a starter from the refrigerator, which I just fed, but after spending some time in the warmth, it will become more loose and fluid.
How to use sourdough
It is not difficult to guess that the sourdough prepared by us has a moisture content of 100%, that is, it contains equal parts of flour and water. This saves us from having to calculate proportions with a calculator every time we are going to bake something new. Take 2 parts sourdough to 9 parts flour for the dough, adjusting for the amount of water, and otherwise cook according to the usual recipe.
I explain with an example. Let's say you are going to cook, which requires:
- 250 g flour
- 160 g of water
- 1/2 tsp salt
- 1/4 bag of yeast
Divide 250 grams by 10 to find out how much flour to add to the sourdough, and multiply by two to get the total weight of the sourdough (since flour and water are in a 1:1 ratio in sourdough), and measure out 50 grams of sourdough. Add 250-25=225 grams of flour and 160-25=135 grams of water, and half a teaspoon of salt. Of course, we cross out the yeast, and we continue to work with the dough in accordance with the recipe.
How to overfeed sourdough
If the recipe only uses rye flour, you can also take wheat sourdough and add it to the dough according to the proportions above. But if you wish, you can overfeed the sourdough, making rye out of wheat in order to bake bread with a more sour rye taste. To do this, take 20 grams of sourdough, add 40 grams of warm water and 40 grams of rye flour, then keep the sourdough warm and feed it every 12-24 hours in the same proportions. After a few days, you will have a completely rye sourdough that can be used to make rye bread.


